ACFの画像で、スライド表示するサムネイル付ギャラリーを作成
前回のBLOGでは、ACFの画像で、シンプルなサムネイル付きギャラリーを作成する方法を紹介しました。今回は、ACFの画像で、スライド表示するサムネイル付ギャラリーを作成する方法を紹介します。


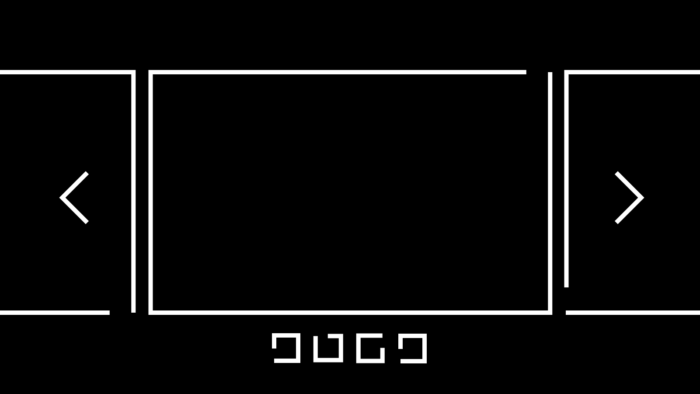
出典 : slick![]()
今回のDEMOも、カフェのギャラリーです。

8つの画像をギャラリーにしました。サムネイルをクリックするとメイン画像が切り替わります。
ACF設定
フィールドタイプは、画像です。フィールドラベルに編集画面に表示する名前、フィールド名にPHPに記入する名前を設定します。戻り値の形式は、画像配列です。ライブラリは、すべてです。

フィールドタイプは、画像です。
同じように、他7つのフィールドも作成します。これで、ACF設定は終了です。

他7つのフィールドも作成
コード
シングルページのループ内に下記コードを入力します。
<div class="thumbslider_wrapper">
	<ul class="slidethumb-gallery">
		<?php
			$image = get_field('thumbslide01');
			if( $image ):
			$url = $image['url'];
  			$title = $image['title'];
 			$alt = $image['alt'];
			$size = 'large';
 			$thumb = $image['sizes'][ $size ];
		?>
			<li>
				<img src="<?php echo esc_url($thumb); ?>" alt="<?php echo esc_attr($alt); ?>" />
			</li>
		<?php endif; ?>
		<?php
			$image = get_field('thumbslide02');
			if( $image ):
			$url = $image['url'];
  			$title = $image['title'];
 			$alt = $image['alt'];
			$size = 'large';
 			$thumb = $image['sizes'][ $size ];
		?>
			<li>
				<img src="<?php echo esc_url($thumb); ?>" alt="<?php echo esc_attr($alt); ?>" />
			</li>
		<?php endif; ?>
		<?php
			$image = get_field('thumbslide03');
			if( $image ):
			$url = $image['url'];
  			$title = $image['title'];
 			$alt = $image['alt'];
			$size = 'large';
 			$thumb = $image['sizes'][ $size ];
		?>
			<li>
				<img src="<?php echo esc_url($thumb); ?>" alt="<?php echo esc_attr($alt); ?>" />
			</li>
		<?php endif; ?>
		<?php
			$image = get_field('thumbslide04');
			if( $image ):
			$url = $image['url'];
  			$title = $image['title'];
 			$alt = $image['alt'];
			$size = 'large';
 			$thumb = $image['sizes'][ $size ];
		?>
			<li>
				<img src="<?php echo esc_url($thumb); ?>" alt="<?php echo esc_attr($alt); ?>" />
			</li>
		<?php endif; ?>
		<?php
			$image = get_field('thumbslide05');
			if( $image ):
			$url = $image['url'];
  			$title = $image['title'];
 			$alt = $image['alt'];
			$size = 'large';
 			$thumb = $image['sizes'][ $size ];
		?>
			<li>
				<img src="<?php echo esc_url($thumb); ?>" alt="<?php echo esc_attr($alt); ?>" />
			</li>
		<?php endif; ?>
		<?php
			$image = get_field('thumbslide06');
			if( $image ):
			$url = $image['url'];
  			$title = $image['title'];
 			$alt = $image['alt'];
			$size = 'large';
 			$thumb = $image['sizes'][ $size ];
		?>
			<li>
				<img src="<?php echo esc_url($thumb); ?>" alt="<?php echo esc_attr($alt); ?>" />
			</li>
		<?php endif; ?>
		<?php
			$image = get_field('thumbslide07');
			if( $image ):
			$url = $image['url'];
  			$title = $image['title'];
 			$alt = $image['alt'];
			$size = 'large';
 			$thumb = $image['sizes'][ $size ];
		?>
			<li>
				<img src="<?php echo esc_url($thumb); ?>" alt="<?php echo esc_attr($alt); ?>" />
			</li>
		<?php endif; ?>
		<?php
			$image = get_field('thumbslide08');
			if( $image ):
			$url = $image['url'];
  			$title = $image['title'];
 			$alt = $image['alt'];
			$size = 'large';
 			$thumb = $image['sizes'][ $size ];
		?>
			<li>
				<img src="<?php echo esc_url($thumb); ?>" alt="<?php echo esc_attr($alt); ?>" />
			</li>
		<?php endif; ?>
	</ul>
	<ul class="thumbchoice-btn">
		<?php
			$image = get_field('thumbslide01');
			if( $image ):
			$url = $image['url'];
  			$title = $image['title'];
 			$alt = $image['alt'];
			$size = 'large';
 			$thumb = $image['sizes'][ $size ];
		?>
			<li>
				<img src="<?php echo esc_url($thumb); ?>" alt="<?php echo esc_attr($alt); ?>" />
			</li>
		<?php endif; ?>
		<?php
			$image = get_field('thumbslide02');
			if( $image ):
			$url = $image['url'];
  			$title = $image['title'];
 			$alt = $image['alt'];
			$size = 'large';
 			$thumb = $image['sizes'][ $size ];
		?>
			<li>
				<img src="<?php echo esc_url($thumb); ?>" alt="<?php echo esc_attr($alt); ?>" />
			</li>
		<?php endif; ?>
		<?php
			$image = get_field('thumbslide03');
			if( $image ):
			$url = $image['url'];
  			$title = $image['title'];
 			$alt = $image['alt'];
			$size = 'large';
 			$thumb = $image['sizes'][ $size ];
		?>
			<li>
				<img src="<?php echo esc_url($thumb); ?>" alt="<?php echo esc_attr($alt); ?>" />
			</li>
		<?php endif; ?>
		<?php
			$image = get_field('thumbslide04');
			if( $image ):
			$url = $image['url'];
  			$title = $image['title'];
 			$alt = $image['alt'];
			$size = 'large';
 			$thumb = $image['sizes'][ $size ];
		?>
			<li>
				<img src="<?php echo esc_url($thumb); ?>" alt="<?php echo esc_attr($alt); ?>" />
			</li>
		<?php endif; ?>
		<?php
			$image = get_field('thumbslide05');
			if( $image ):
			$url = $image['url'];
  			$title = $image['title'];
 			$alt = $image['alt'];
			$size = 'large';
 			$thumb = $image['sizes'][ $size ];
		?>
			<li>
				<img src="<?php echo esc_url($thumb); ?>" alt="<?php echo esc_attr($alt); ?>" />
			</li>
		<?php endif; ?>
		<?php
			$image = get_field('thumbslide06');
			if( $image ):
			$url = $image['url'];
  			$title = $image['title'];
 			$alt = $image['alt'];
			$size = 'large';
 			$thumb = $image['sizes'][ $size ];
		?>
			<li>
				<img src="<?php echo esc_url($thumb); ?>" alt="<?php echo esc_attr($alt); ?>" />
			</li>
		<?php endif; ?>
		<?php
			$image = get_field('thumbslide07');
			if( $image ):
			$url = $image['url'];
  			$title = $image['title'];
 			$alt = $image['alt'];
			$size = 'large';
 			$thumb = $image['sizes'][ $size ];
		?>
			<li>
				<img src="<?php echo esc_url($thumb); ?>" alt="<?php echo esc_attr($alt); ?>" />
			</li>
		<?php endif; ?>
		<?php
			$image = get_field('thumbslide08');
			if( $image ):
			$url = $image['url'];
  			$title = $image['title'];
 			$alt = $image['alt'];
			$size = 'large';
 			$thumb = $image['sizes'][ $size ];
		?>
			<li>
				<img src="<?php echo esc_url($thumb); ?>" alt="<?php echo esc_attr($alt); ?>" />
			</li>
		<?php endif; ?>
	</ul>
</div>jQuery、slickを読み込みます。JavaScriptファイルを作成し、下記コードを入力します。
$('.slidethumb-gallery').slick({
	infinite: true,
	arrows: false,
	asNavFor: '.thumbchoice-btn',
});

$('.thumbchoice-btn').slick({
	infinite: true,
	slidesToShow: 4,
	focusOnSelect: true,
	prevArrow: '<div class="slickthumb-prev"></div>',
	nextArrow: '<div class="slickthumb-next"></div>',
	asNavFor: '.slidethumb-gallery',
});CSSでスタイルを整えます。
.thumbslider_wrapper{
	width:100%;
	max-width:900px;
	margin:auto;
}

.thumbslider_wrapper img{
	width: 100%;
	height: auto;
	vertical-align: bottom;
}

.slidethumb-gallery {
	margin: 0;
}

.slidethumb-gallery li{
	height: 600px;
	overflow: hidden;
	object-position: 50% 50%;
}

.slidethumb-gallery li img{
	width: 100%;
	height: 100%;
	object-fit: cover;
}

.slickthumb-prev,
.slickthumb-next {
    position: absolute;
	z-index: 3;
    top: 42%;
    cursor: pointer;
    outline: none;
    border-top: 2px solid #ccc;
    border-right: 2px solid #ccc;
    height: 25px;
    width: 25px;
}

.slickthumb-prev {
    left:2.5%;
    transform: rotate(-135deg);
}

.slickthumb-next {
    right: 2.5%;
    transform: rotate(45deg);
}

.thumbchoice-btn li{
	cursor: pointer;
	outline: none;
	background: #333;
	height: 130px;
	overflow: hidden;
	object-position: 50% 50%;
}

.thumbchoice-btn li img{
	opacity: 0.4;
	width: 100%;
	height: 100%;
	object-fit: cover;
}

.thumbchoice-btn li.slick-current img{
	opacity: 1;
}

@media screen and (min-width: 1250px) {

	.thumbslider_wrapper{
		padding: 5em 0;
	}

	.thumbchoice-btn li{
		height: 150px;
	}

}
設置
編集画面にサムネイルギャラリーのフィールドが表示されます。画像を追加をクリックして、メディアライブラリから画像を選択し、選択ボタンをクリックします。画像フィールドに画像が設定されます。
残りの画像も同様に設定します。これで完成です。

画像を追加をクリック

メディアライブラリから画像を選択

画像フィールドに画像が設定

残りの画像も同様に設定
以上で今回の説明は終了です。サムネイルが多くなっても、レイアウトが変わらないので使いやすいギャラリーです。また、編集画面のみで設定できるので便利ですね。今回の設定では、縦長、横長両方の画像を設置できます。